In this post well feature 83 tutorials for creating your own photo manipulation. The tutorials shown here will teach a various variety of techniques and will work towards end results of all kinds.
Photoshop is great tool for combining several images into a scene that can’t always be created in real life, like an android. In this tutorial I will teach you how to manipulate body parts, create depth from missing pieces and also how to integrate gears and engines to make an sexy mechanical pinup.
It doesn’t take much to make a great looking piece if you have a strong initial concept and some nifty tricks to cover the technical side. In this tutorial Arturas Petkevicius shows you quick and easy techniques ranging from the Warp tool to clipping masks and adjustment layers to create a stunning final image.
Learn how to create a headless, mauled Statue of Liberty as seen in the film Cloverfield in Photoshop.
Photoshop allows us to create the impossible, like this mystic and nonexistent creature called "Chimera." You’ll learn some techniques of photo manipulation, how to apply shadows and lights, several ways of extracting pictures from its backgrounds and more.
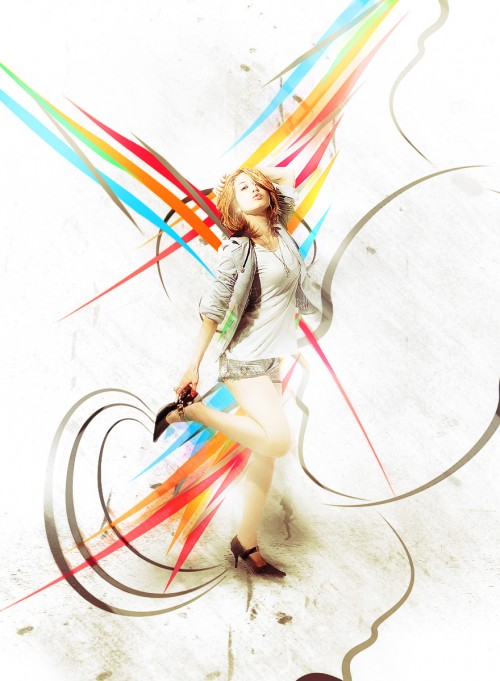
Vector graphics design is one of the leading styles for print magazines and in titling of movies right now. In this tutorial, we are going to cover the entire body of a woman with stock vector art by employing some of the basic tools and blending options in Adobe Photoshop. We will also need Adobe Illustrator to open the vector files and to provide a source for importing the vectors into Photoshop.
Today, I’m going to show you how to create Halloween illustration using simple tools and techniques like Pen Tool, Brush Tool, Layer Style, etc. in Adobe Photoshop. Layered PSD file included. Let’s get started!
In this short and quick Adobe Photoshop digital art tutorial, we are going to let somebody fall down inside a gloomy black & white scene. You will learn how to cut out body parts, add rain to a composition, use Gradient Map adjustment layers and other techniques that are useful in performing artistic photo manipulations.
In this tutorial i am going to teach you how you can create one very interesting photo stylizing effect by fragments.
In this tutorial, we will be creating a surrealistic room with realistic water as its floor, real clouds as its wallpaper with a clock on the wall and a boat on the water floor. We will learn a lot of technical aspects like visualizing and creating a perspective using the ruler and the transform tools especially the distort tool, creating realistic waves using the brush tool and two wave brush sets, using brush textures and apply it to the walls to make them realistic.
In this tutorial We`ll learn how to make a horse reach out of a frame with some simple, but cool techniques. Besides of the techniques you will learn how to combine colors to make the scene even more dramatic.
For this Photoshop tutorial, I will be showing you how to make a dark and mysterious scene with the subject having a TV for a head. You will see how to seamlessly replace a person’s head with another object—in this case, a television—and how to create a stormy sky using brush strokes. We’ll also deal with creating realistic lights and shadows as well as how to retouch subjects who are against a light source.
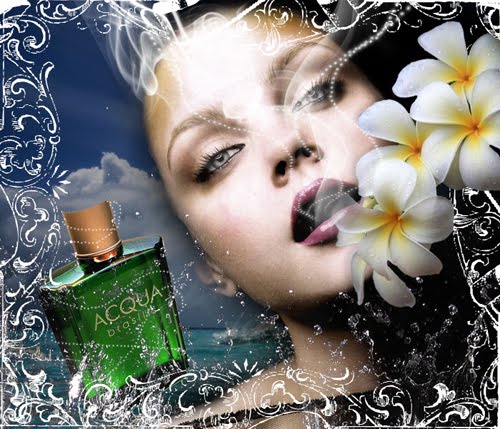
In this tutorial I will show you how I created “A Life Of Aquatic Sounds”. We will realize it using a variety of blending mode tricks, photo filters and other useful Photoshop techniques. At the end of this process we will have a beautiful photo manipulation, realized in a short time and a very easily way.
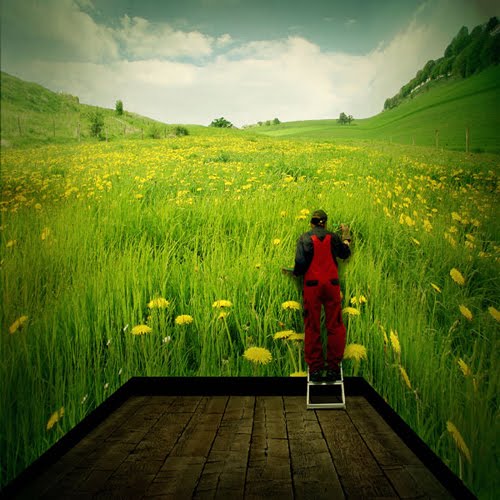
In this photo manipulation tutorial, you will learn how to create a realistic composition of a painter using a room as his canvas. There’s a twist. It looks like the room is outdoors in a vibrant field! We will cover professional-level Photoshop tricks such as correcting the viewer’s perspective, adding accurate shadow and highlights, various blending techniques such as altering luminosity and shadows of the scene, adding textures and a vignette, and much more.
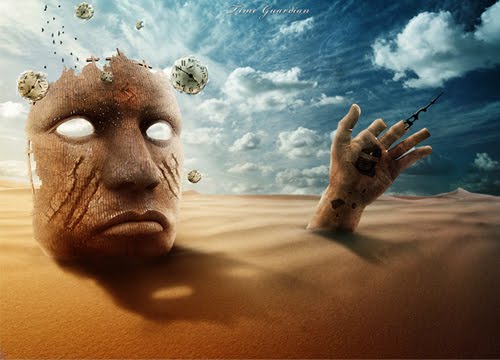
In this tutorial I am going to show you how to create a surreal time-themed photomanipulation using Photoshop. The name of this photomanipulation is "Time Guardian" and it was originally created by Mariusz Karasiewicz (aka
FISHBOT1337).
First thing you need to remember that every photo or digital artwork must have 1 point that catches the viewer’s attention. It can be (and mostly is) face or the eyes, but it can also be any other spot, that is the leitmotif of the canvas. When having too many points that catch the visitor’s attention, your artwork loses it’s charm and simply may lack the zest it would otherwise have with less accents on the canvas. So first thing you need to remember that in art, mostly, less is more.
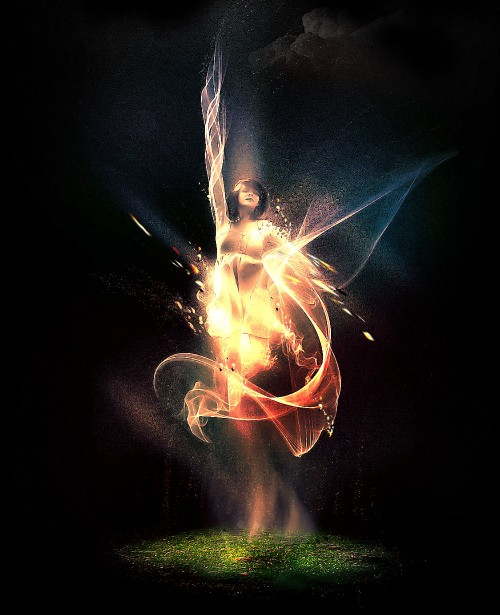
Here is a tutorial showing how you can create a fairy out of a human, as shown below. The psd file for this tutorial can be found at the bottom of this post.
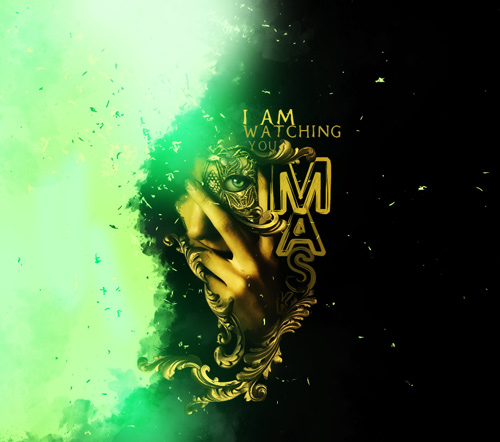
In this Adobe Photoshop tutorial, we will create a dark photo manipulation scene with a very creepy/eerie/mysterious atmosphere. We will go through some basic techniques for making a shadowy scene and using some creative lighting effect methods that can spice up your work, such as adding a green flame, light streaks and sparkles. For this tutorial, you should be familiar with Photoshop basics, using the Pen Tool (P), and layer masks.
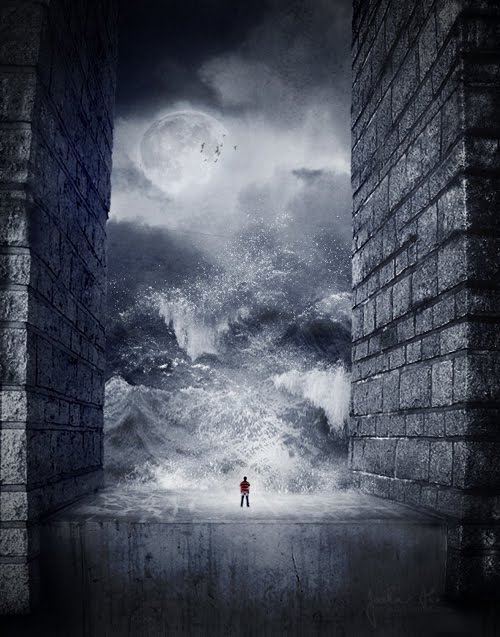
Learn how to create this amazing apocalyptic photo manipulation with Photoshop! You’ll learn how to blend elements such as water and moon, create seamless structures with the Clone Stamp tool, and finish it off with a cold movie photo effect.
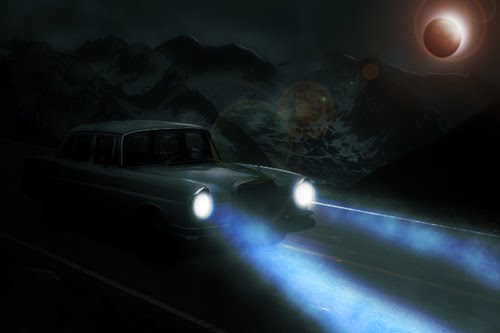
Photoshop is an excellent tool to combine several photos into one seamless image. In today’s tutorial we will use different tools and techniques to create an abandoned automobile in a moonlit night scene in Photoshop. Let’s get started!
Photo manipulation is an art that requires a lot of patience along with the expertise in Photoshop. With our creativity and imagination, we can manipulate any photograph the way we want. Its all about how we use our imagination and properly understand the effects that can be achieved in Photoshop and other similar tools and employing them with a lot of experimentation.
Learn how to create this surreal photo manipulation in Photoshop. You’ll learn the basics of combining stock photos, how to blend them in by adding light and shadows, and complete it with a vintage photo effect.
In this tutorial, I will show you how you can Create Beautiful Surreal Photo Effect via Cloud, Star and Vexel Hair in Photoshop. This is an intermediate level tutorial so some steps can be tricky, but why not have a try!
What is more fun than mixing people with animals? The results can often be cute, funny, or even a bit disturbing. In today’s tutorial, I will demonstrate how to create a fantasy bird girl illustration using digital painting and photo manipulation techniques. Let’s get started!
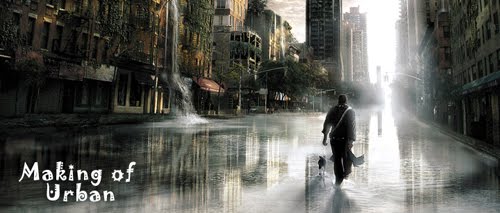
Matte painting plays a major role in today’s films. The first known matte painting shot was made in 1907 by Norman Dawn (ASC), you can see how the traditional matte painting evolved from “The Wizard Of Oz” to the ground breaking “Avatar”. In this tutorial I’m going to show you some techniques in matte painting to create a distressed surreal cityscape.
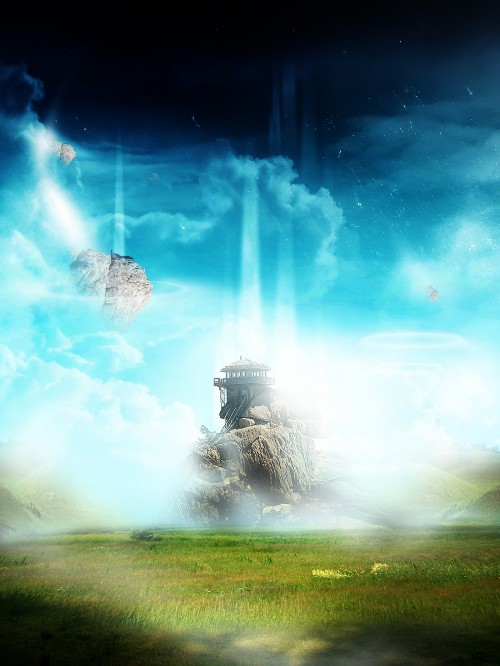
In this tutorial, I will show you how you can quickly and effectively Create Fantasy Scene via Combining Landscape Images in Photoshop. Some steps can be a little tricky for beginners, but why not have a try!
One of the best things about Photoshop is that it allows us to create some pretty amazing images from some of the most surprising objects. Today, we will create a fantasy flying ship from a photo of a banana. Let’s get started!
In this tutorial we will be creating a Surreal Atmospheric Image.
This tutorial will provide the evolution process of one of my works. In the tutorial you'll learn some manipulation methods and have a glimpse on how to create a surreal image, taking in consideration a solid theme or idea, in this case the theme is naturally about time and its (un)possibility to redeem itself.
In this Photo manipulation tutorial, you will learn how to create a dark surreal scene using few Photoshop techniques and a lot of stock images. Following this tutorial, you will learn how to add a dark unsubstantial effect to your image. We will start this tutorial with Cinema4D, and then we will use a lot of photo manipulation techniques, like blending modes, cloning and we will work with colors and filters. So let's start to learn new techniques.
Learn how to combine various photographic elements into a cohesive, surreal space-age scene. You will learn how to work with lighting, blending options, and adjustment layers.
In this tutorial you will learn how to use stock photography, 3d elements, and various techniques to create a cosmic-inspired dreamy scene in Photoshop.
This tutorial shows the creation of one of my images. It shows how I adjust lighting and colours in my images to create this surrealistic turtle. Hopefully, you'll be able to transfer these methods to your own work.
We will use well chosen images, textures and most off all our imagination in combination with Photoshop techniques to create an outstanding Montage Photo.
In this tutorial, We`ll learn to create this Surreal/Sci-fi Environment Inspired by the “Inception” Movie in Photoshop. Some steps can be a little tricky, but why not have a try!
I’ve been wanting to get stuck into some good old photo manipulation artwork for some time, and after being inspired by the recent Alice in Wonderland movie I had to urge to create my own dreamy fantasy scene. Follow this walkthrough of my design process where I build a blissful fantasy scene with various lighting and colouring effects, then use the artwork as a base for a complete album cover design.
So as I mentioned before this image, I will present in this case study, was created in my first duel and the subject was water. I really like the result because besides the visual strength it has a simple idea that makes us wonder and think about life and aging.
I was so impressed the day I saw this "smoke art" photo effect. I decided to recreate it using Photoshop and ended up with the result shown below.
There are quite a few tutorials showing how to create this type of image, but I decided to try it myself. I haven't checked any tutorial because I wanted to play with the tools, so the technique might be the same as other tutorials but I really don't know. Besides I think a tutorial on Roy's style is always a great add to the tutorials section of Abduzeedo.
This photo manipulation tutorial will show you how to create this realistic fantasy image by combining several photos together and finishing it with water lilies and fairy dust. You will learn how to compose an image using multiple photos, simulate depth of field, and warp a persons ear to an elf ear.
This is the most advanced tutorial I ever written and also the longest. Since there are many important things to show, I will not entertain myself on showing how to crate a mask or how to make a clipping layer, I assume you already have a medium-advanced skill with photoshop.
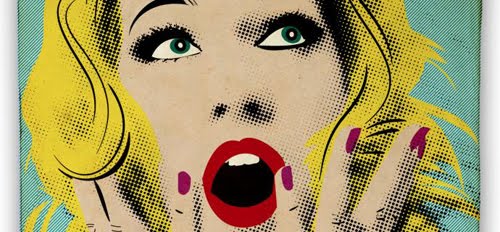
Here is a rather quick tutorial on how you can create a very nifty comic art style photo manipulation in Adobe Photoshop. We will show you all steps you need to know in order to create cool comic book styled art pieces out of your photographs!
Learn how to create this amazing apocalyptic photo manipulation with Photoshop! You’ll learn how to blend elements such as water and moon, create seamless structures with the Clone Stamp tool, and finish it off with a cold movie photo effect.
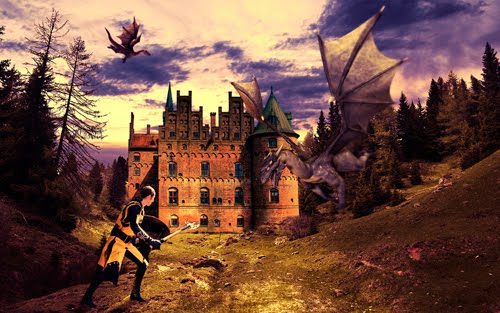
In this photo manipulation tutorial I will show you how to create an image with dragons, knights and castles. I’ll show you how to replace a sky in a photo and how to create a surreal scene. Let’s get started!
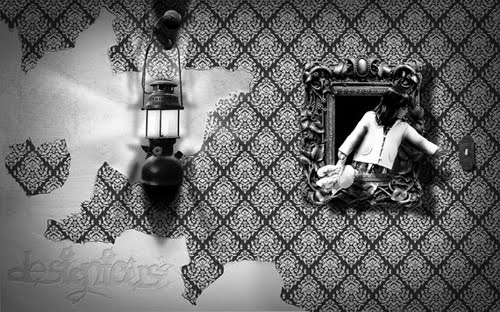
In today’s tutorial you will learn how to give a photo a complete glamour style using patterns and masks in Adobe Photoshop. Layered PSD file included. Let’s get started!
This tutorial will show how to turn a usual photo into a watercolor painting, quickly and simply.
In this tutorial you will learn how to take a standard photo of a girl and tear it into pieces using some stock images and some nifty Photoshop techniques.
Today’s tutorial was inspirited by digital artist Rob Shields who graciously granted permission for us to use his work as inspiration. I chose his work titled “Keep me in the dark.” In this illustration it is essential that you use a tablet; especially for the doodles and the white strokes that will give the portrait a more detailed effect. Let’s get started!
This tutorial is created using Pen Tool, Smudge tool, Masking, Gradient, and some transform options. You'll get some good expert level techniques from this tutorial.
Drawn elements are certainly something that can enhance an illustration. Even if you’re not very good at drawing, you can still create a quality piece. All you need is a good idea and some Photoshop skills. And if you don’t believe me, you will definitely change your mind after reading this tutorial. So let’s take a look inside!
In this Awesome Photoshop tutorial, i’m going to show you how to create a surreal composition using photo manipulation and illustration techniques. This one is a two-parts tutorial, here is the first part. Have fun.
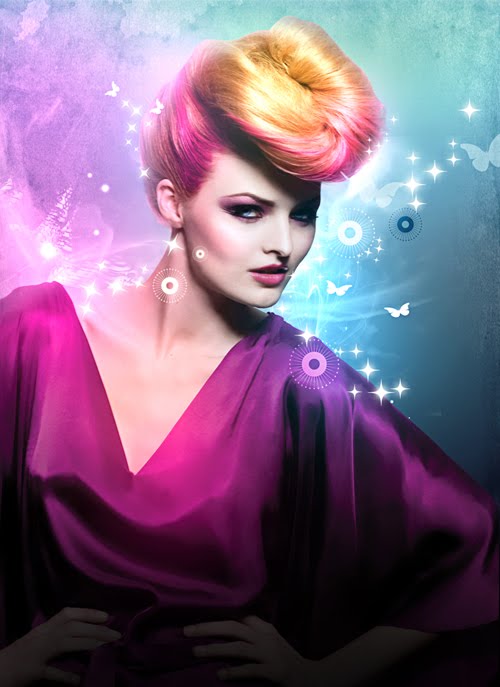
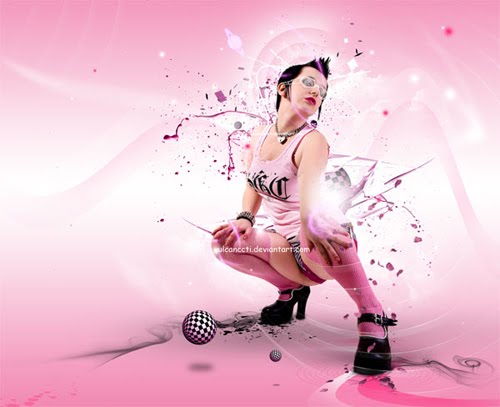
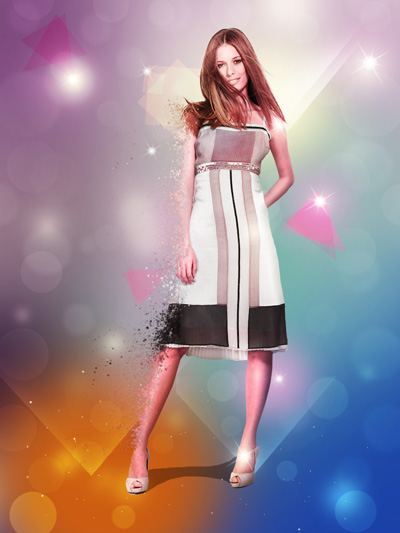
In this tutorial you will learn plenty of various photoshop techniques. You will learn how to work with shapes, layers, filters and many more. This tutorial is pretty complex and I think it is more for advanced designers, but also if you are new in photoshop you can try to create this pinky effect, because all steps are described in detail. So, lets start.
So in this tutorial I will show you how you can mix stock photos with blend modes, basic filters and tools to create a really cool design. The whole process is very simple and won't take you more than 1 hour to finish the tutorial.
In this tutorial we are going to create a very cool looking Girl wallpaper. In this tutorial we will combine digital painting, some design elements and a photo to create an amazing wallpaper.
Create a burning flower using Adobe Photoshop CS3.
The name of this photomanipulation is "Time Guardian" and it was originally created by Mariusz Karasiewicz (aka FISHBOT1337). I want to take this opportunity to thank him for collaborating with me on this tutorial.
So in this tutorial I will show you how to create a really cool and super easy typographic portrait in Photoshop. We will use the Displace filter and some Blend Modes to achieve the effect. The whole process is quite simple but it might take you some time to add the texts and elements, but once you do that the rest is very straight forward.
In today’s tutorial I will show you how to design a CD cover using several photo manipulation techniques, how to keep critical text layers editable for any future change and how to render a quick mockup using the Vanishing Point filter. Let’s get it started!
Today, we will create a nice wallpaper using stock vectors, images and a bit of imagination. Along, we will also learn some photo retouching techniques, enhancement and changing the lighting source.
So in this tutorial I will show you how to create the effect of one of the Inception posters, the one with the word Inception made of buildings on an aerial photo of a city. To create this effect we will use the new 3D tool in Photoshop CS 5 called Repousse and an aerial photo from Pixelcase (
http://www.pixelcase.com.au/).
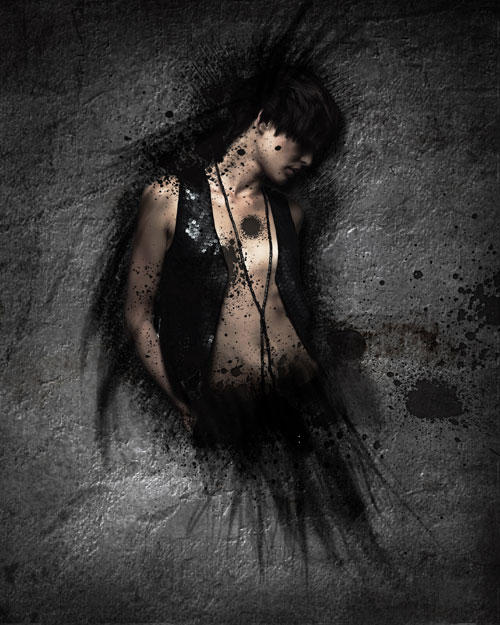
We will learn how to blend fashion photography with custom brushes into dramatic and surreal illustration using Photoshop CS5 techniques. Layered PSD file included. Let’s get started!
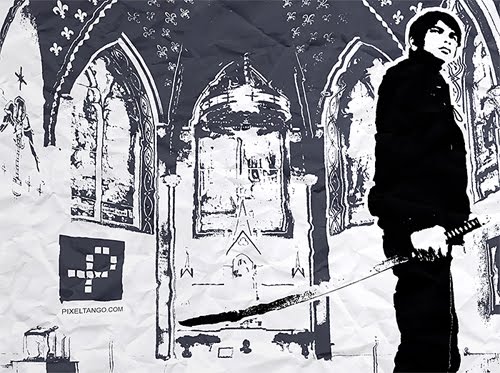
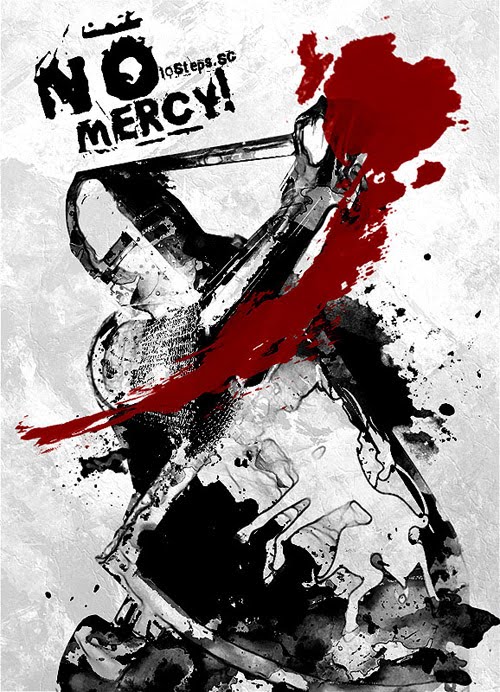
In this tutorial, we will see how to use Photoshop filters and brushes to create an ink splattering knight composition. This is a relatively simple technique, which yields excellent artistic results.
Photoshop is an excellent tool to combine several photos into one seamless image. In today’s tutorial we will use different tools and techniques to create an abandoned automobile in a moonlit night scene in Photoshop. Let’s get started!
In this Photoshop tutorial, I would like to tell how to make a beautiful mystery grunge artwork, using some stock images and brushes. It is not very hard work, but it requires some skill and your imagination. This work is very well suited for desktops and time for her creation will not take more than 2 hours. So let’s get started!
In this 25 minute Photoshop video tutorial, Slav will show you how to transform a beautiful model into an awesome robot-like character by using only basic photoshop tools.
In this tutorial, you can Create this Awesome Abstract Photo Effect via Layer Masking and Custom Patterns.
We will learn how to use different tools and techniques to create a stunning photomontage using Adobe Photoshop CS5. Layered PSD file included.
Today we will use several simple techniques to realize a beautiful melancholy photo manipulation starting from the image of a model. We will deal in particular with masks, brushes and lots of adjustment layers to have full color control.
This tutorial shows the creation of one of my images. It shows how I adjust lighting and colours in my images to create this surrealistic turtle. Hopefully, you'll be able to transfer these methods to your own work.
In this photoshop tutorial I will show you how to use stock images to make a beautiful digital artwork with nicely colored lights. All you need for this tutorial is my Colors in Motion textures pack and a model.
In this tutorial we will use plenty of Photoshop tools, and we also will use another Adobe product - Cinema 4D, but if you don't have Cinema 4D that's ok, you will be able do all rest steps of this tutorial. I hope you will learn some new tricks. So, let's move forward and start this tutorial.